Using reclaimed wood is a hot trend in home décor. Unfortunately, not everyone has old wood lying around.
You can search for old, discarded wood or reclaim it yourself from local structures, such as dilapidated barns (with permission from owners, of course), or purchase reclaimed wood from wholesale suppliers.
 I made several projects from reclaimed wood using our old dock wood pulled from the lake a few years ago. Alternatively, wooden pallets are an easily accessible option for those just starting out with the medium. Pallet wood can be stained to produce an aged look.
Reclaimed wood adds wonderful texture. Textures are important to provide depth and interest to any space, especially when the room is dominated by one particular color.
For my ongoing room makeover series, I wanted to do something that would emphasize the window as the focal point of the space.
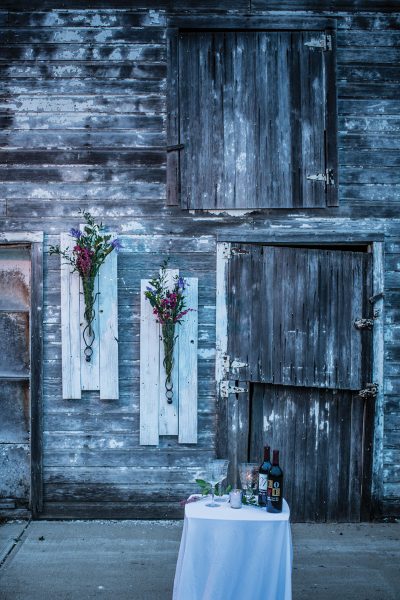
I wanted the interior accent to resemble a design element typically seen on the outside. So, instead of shutters, I developed reclaimed wood wall vases to frame the interior side of the window.
The reclaimed wood would serve as the backdrop for wall-mounted glass vases. They would take advantage of the texture from the weathered wood, while the glass vases would layer another design element over the wood itself—adding even more depth and interest to the entire wall.
With wall vases, you are also able to change up the mood for seasonal decorations, holidays, or simply for a different look.
The beauty of this is you don’t have to spend a lot to make a statement! Look for wood you already have around your house.

ITEMS NEEDED:
- r
- Reclaimed wood boards (I used six pieces of wood, three per wall vase on each side of the window)
- Scrap pieces of wood (for the back side, to hold the wooden boards together)
- Nail gun (or hammer and nails)
- Two screws per wall vase and screwdriver
- Hanging wire
- Paint (any color, I used white)
- Paint brush
- A wall-mounted vase (a light fixture or sconce could be used instead) to be mounted on the reclaimed wood
r
r
r
r
r
r
r
r
r
DIRECTIONS:
- r
- Cut each board the same length.
- I painted each board individually with a brush. I wanted the character of the reclaimed wood to come through, so I used very little white paint and lightly went over each piece (none of the boards were painted exactly the same).
- Let dry overnight.
- Arrange boards painted/or pretty side down into the desired pattern. I staggered the middle piece.
- Nail the boards together using the scrap pieces as connectors.
- Drive two screws into the back of each set of connected boards and attach the wire so each rustic wall vase balances evenly when suspended.
- I then attached my wall-mounted vases to the front of each set of boards and decorated the vases accordingly.
- Make sure the wall and materials you have chosen can hold the weight of the completed project.
r
r
r
r
r
r
r
r
r
I used spring flowers in each vase, but you can swap them out for any occasion or season.
Sandy’s yearlong DIY remodeling series began with an introduction to the room in the January/February 2017 issue. The first of five projects, a coffee filter lamp, debuted in the March/April issue. Stay tuned for the next installment. Visit readonlinenow.com to review back issues.
This article appears in the May/June 2017 edition of Omaha Home.


