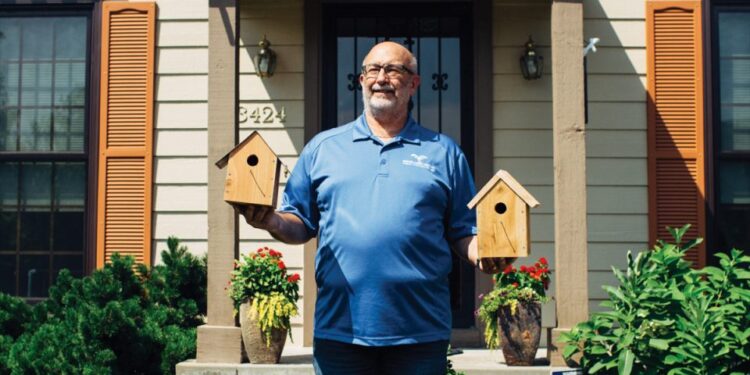
Mark and Leslie Kwasnieski want birdhouses to be properly crafted and well-kept so that every bird can find its own comfortable home.
“When you drive around in the country, a lot of the birdhouses you see on fence posts belong to bluebirds,” Mark says. “Cowbirds then come in and lay their eggs with the bluebirds, so the bluebirds take care of the cowbirds’ eggs and raise them—because the cowbird is much bigger, when it gets older it pushes the bluebirds out of the nest causing them to die.”
Leslie continues: “That’s why you tailor the hole to the bird.”
They educate people on birds and birdhouses through the Nebraska Master Naturalist Program. The nonprofit program is dedicated to training environmentally conscious volunteers in the classroom and the field.
Leslie holds a master’s degree in biology. She initially joined the program to work with recovering birds of prey at Fontenelle Forest’s Raptor Recovery. Encouraged by the experience, she became a board member of the Nebraska Master Naturalist in 2011.
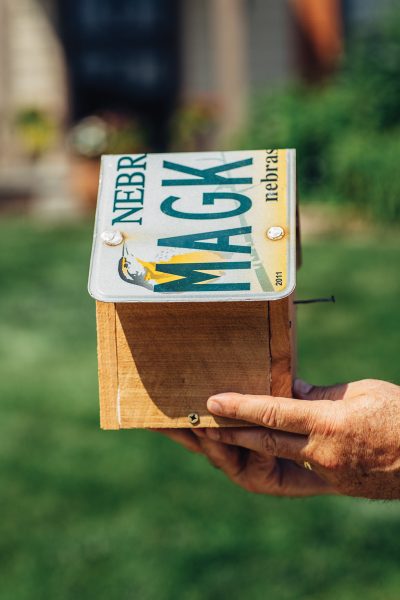
Nowadays, the Kwasnieskis often visit local nature centers and preserves with their grandchildren. Mark has even held demonstrations on how to build a small and simple birdhouse roofed with a license plate at Heron Haven Nature Center in West Omaha.
The couple donates their birdhouses to Nebraska Master Naturalist programs, such as those at Hitchcock Nature Center, Spring Creek Prairie Audubon Center, Glacier Creek Preserve, and Heron Haven.
Mark says anyone with $4 for materials, a basic understanding of craftsmanship, and the necessary tools can build a birdhouse topped with a license plate.r
Materials:
r
- r
- One 1-by-6-inch (actual width is 5 ½ inches by 72 inches), 6-foot-long cedar fence picket (dog-eared). “Make sure the wood is cedar because cedar has natural oils in it that keep insects from eating it,” Mark says.
- One old license plate (this can be picked up at a thrift store or garage sale)
- Four roofing nails
- 14 (1 ½-inch) deck screws
r
r
r
r
r
Tools:
r
- r
- Table saw or handsaw
- Ruler or tape measure
- Pencil
- Hammer
- Electric drill with a 3/8-inch and 1/4-inch drill bit and a 1 ¼-inch hole saw
- Screwdriver or bits for the drill.
r
r
r
r
r
r
r
Instructions:rr
rStep 1: Measure and cut the board. Starting at the bottom of the picket, cut two 6-inch-long pieces for the sides; cut another 6-inch piece for the bottom; and cut two 9-inch-long pieces for the front and back.
Step 2: On the 9-inch pieces, measure 6 inches from the bottom and make a mark. Do this on both edges. From those marks, make lines to the top center of the boards with a ruler. The lines will be at 45-degree angles from the 6-inch marks (for a 90-degree roofline). Cut the wood along the lines.
Step 3: Select one of the 9-inch pieces as the front of the house. Measure 3 inches from the point and mark. Cut an entry hole using the 1 ¼-inch hole saw on your drill.
Step 4: Pre-drill six holes, three on each of the edges of the front of the house with the 3/8-inch drill bit. Attach the two 6-inch pieces to the edges of the front of the house with six screws, making all of the bottoms even. Repeat to attach the back of the house.
Step 5: Place this framed birdhouse on the remaining 6-inch board. From the top looking into the birdhouse frame, outline the inside with the pencil so that you know how much material to trim away. The board should fit into the base of the birdhouse. Drill four 1/4-inch holes in the bottom piece for ventilation and drainage. Use two screws to attach this to the rest of the frame, one per side.
If the bottom has a loose fit, you may need an additional screw on a third side. Remove the screws in the spring to dislocate the base for cleaning.
Step 6: Bend a license plate in half from short end to short end until it reaches a 90-degree angle, making sure it is still readable, and place it atop the birdhouse. You’ll need four roofing nails (two for each side) to hold the license plate tight on the birdhouse. You can use exterior caulk to seal the license plate to the birdhouse frame and fill in under the roofing nailheads.
Step 7 (OPTIONAL): If you want to add a perch, you can use a nail, screw, or a twig. Drill a hole based on the size of what you are using. Pound the nail partially in or add the screw. If you use a twig, make the hole then glue the twig into the hole with waterproof glue.
Visit snr.unl.edu/naturalist for more information about the Nebraska Master Naturalist Program.
This article was printed in the September/October 2018 edition of OmahaHome. To receive the magazine, click here to subscribe.


